
Yes, I know the first in this three part series should be ‘Red’ not ‘Blue’ but that’s not how nature sees it. Spring in the UK brings blue and green first.
In the UK it’s been one of the best years for bluebells that I can remember and the internet is flooded with shots, many of them pretty but largely unmemorable. So what are the considerations when photographing bluebell woods and how can you do it differently?
Finding the blueness
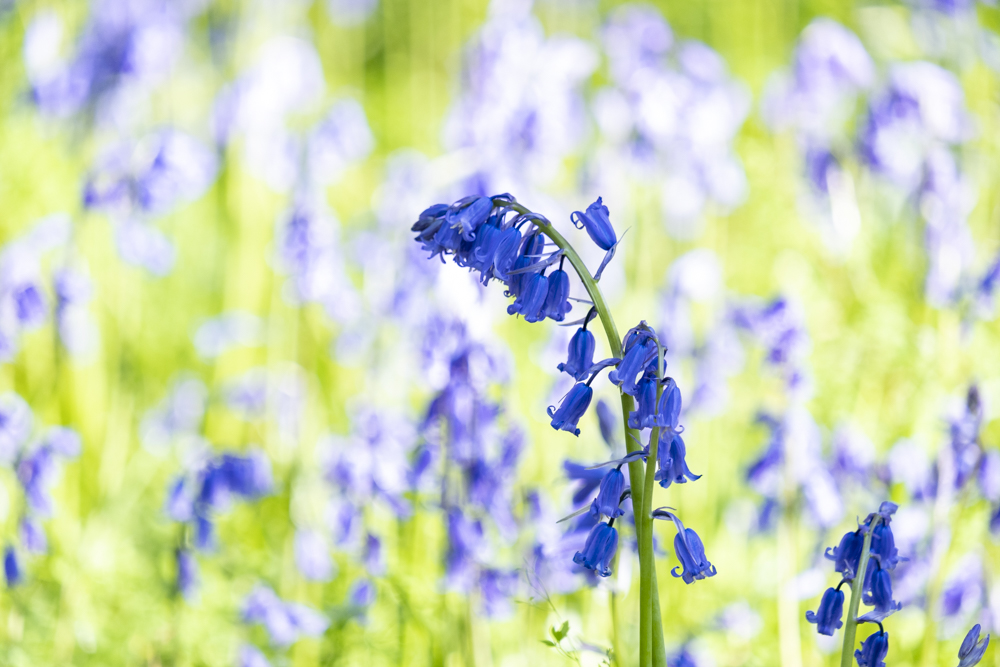
It starts first with understanding your subject. In most lights bluebells aren’t actually blue. They are more a lilac-purple – this is definitely the case in bright sunlight. In the rain, when many of us are hiding our cameras from the damp even though most are extensively water-resistant nowadays, you are more likely to see blue bluebells.
The digital technology also plays a role in this. In the days of film, and with the right film stock and weather conditions, the blue colour would sing. With a digital shot, going with a cooler colour balance can return at least some of the blueness.
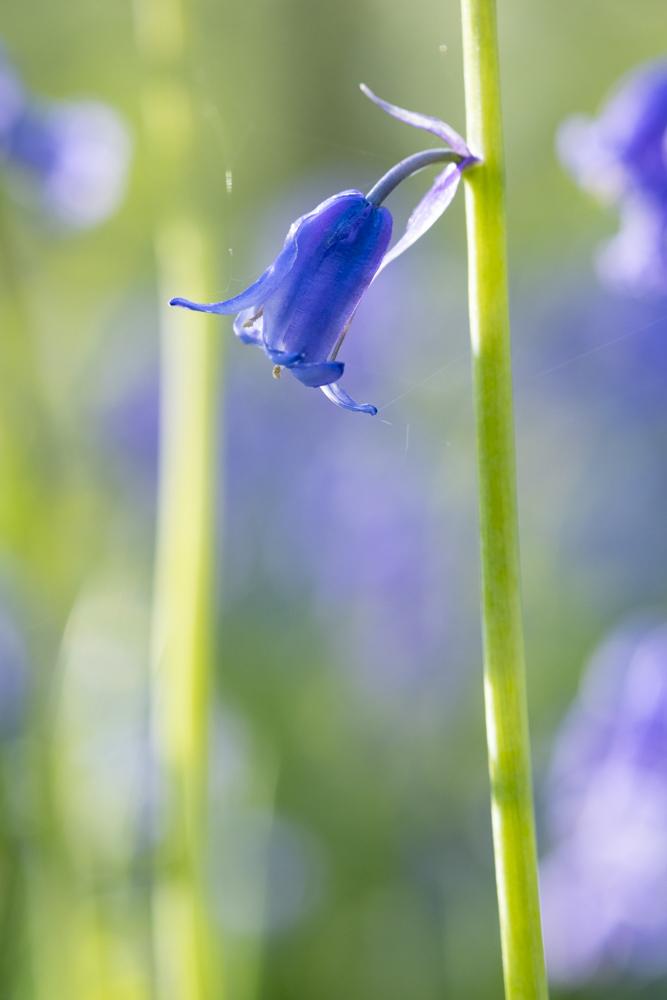
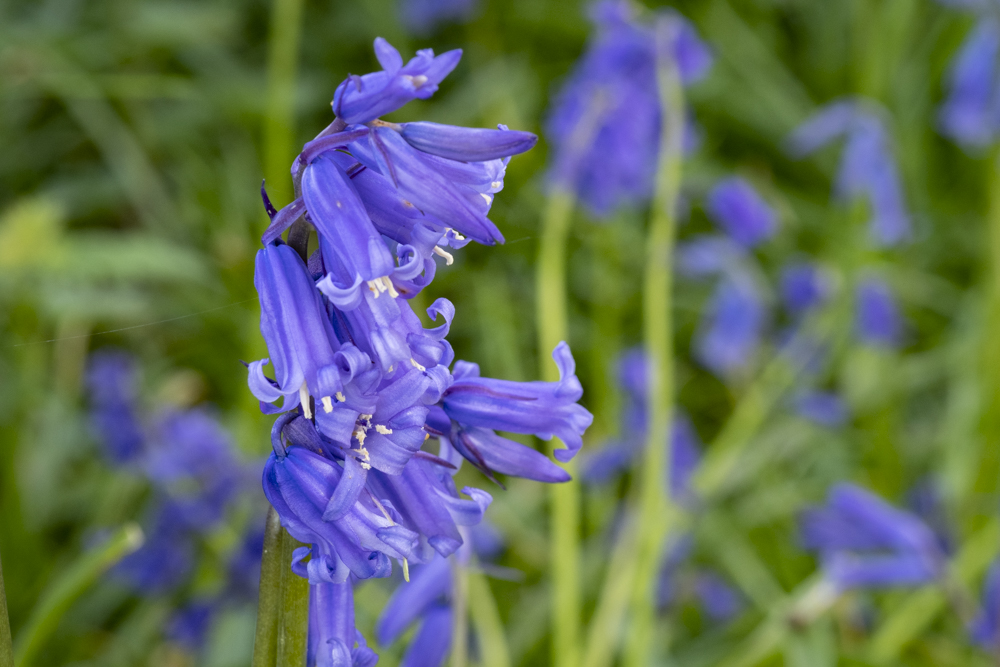
You can see the blue on the bell shaped head. In bright light and warm light the blue looks more lilac.
Looking for the shot
If you walk into a bluebell wood when it’s at its peak, the splash of colour, and the gentle fragrance hits you and make you want to start shooting immediately. Don’t, unless you just want that unmemorable pretty picture!
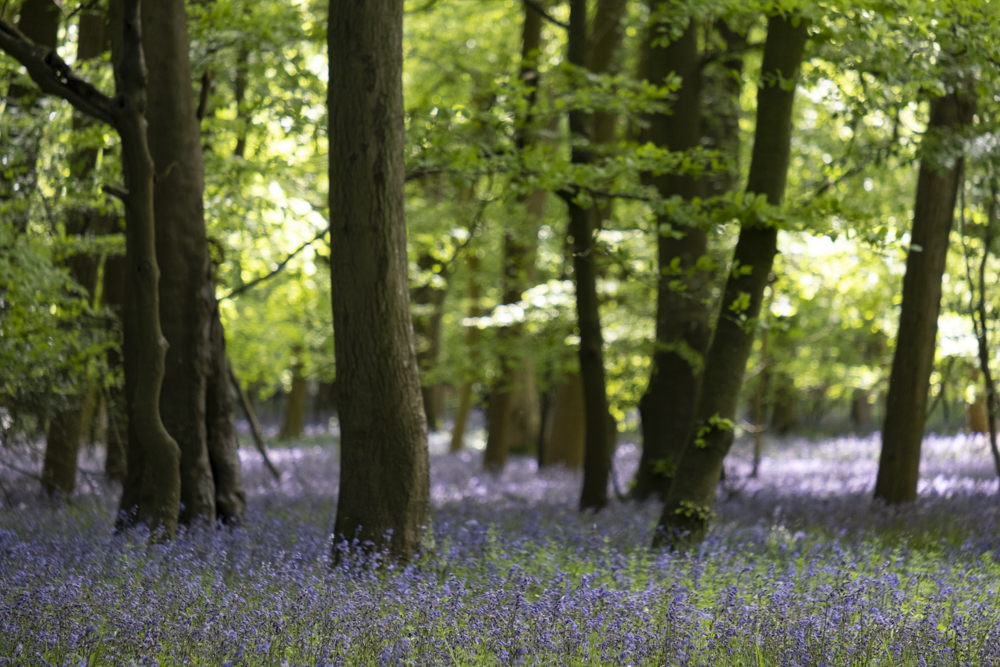
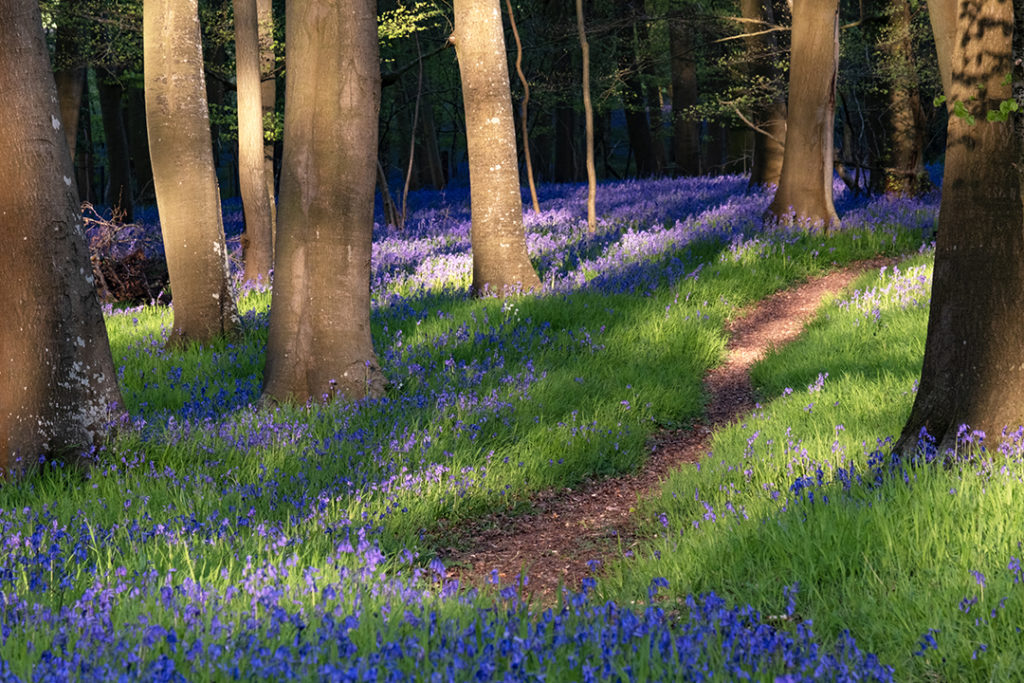
Photographically and compositionally most woodlands are complicated places; lots of trees, lots of fallen branches and, depending on the strength of the light, lots of shadows, highlights and contrasts. These result in vertical, horizontal and diagonal lines breaking the simplicity of many compositions. How do we deal with this?
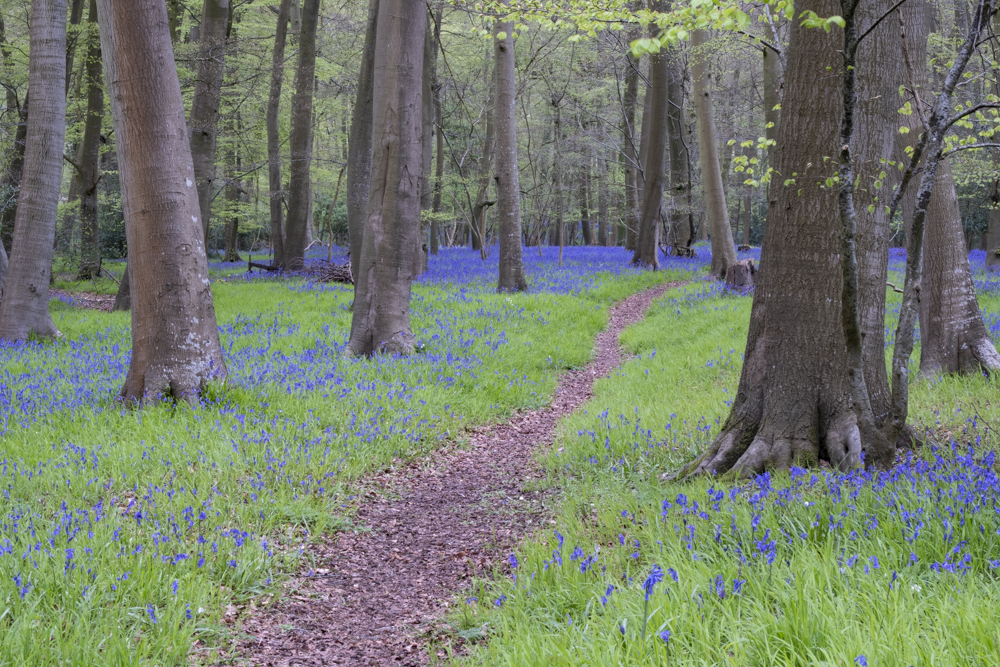
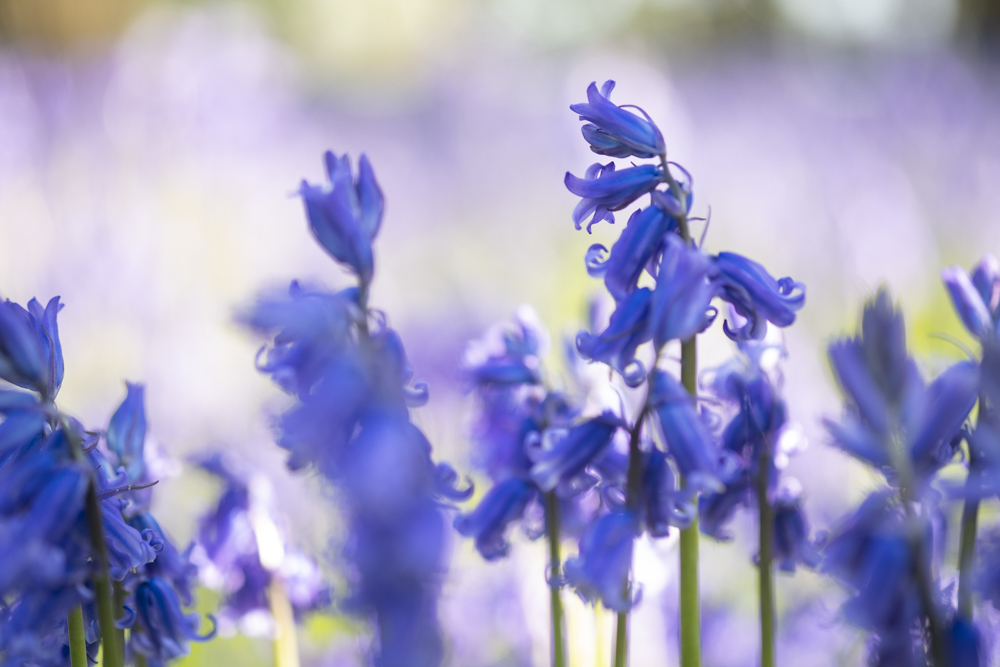
First, as almost always with photography, take some time to look before you go anywhere near your camera. Decisions to make include the direction the light; do you want to shoot with it, into it or with it more to one side. In soft, diffuse light the shadows aren’t harsh so your options tend to be greater. Tones are also softer and more continuous, so the bluebells meld together to form a carpet, especially with a low viewpoint. In strong sunlight the trees cast shadows, creating more lines, but also the contrast and shadows amongst the bluebell flowers increases so that softness in diffuse light or rain is lost. When the sun is low first thing in the morning or as sunset approaches, this light is softer and sometimes creates shadow lines which compliment the composition rather than complicating it.
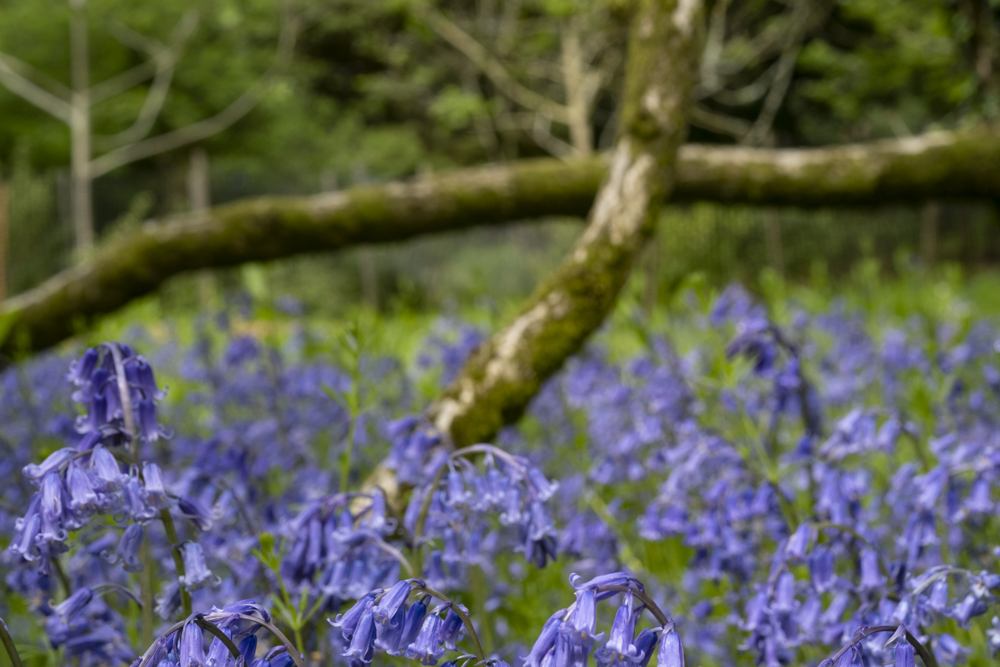
Walking around the woodland and looking will open up viewpoints which give cleaner compositions and which therefore have more impact. It will also allow you to find positions for doing close ups, which give you the flower heads against backgrounds of both similar and contrasting colours.
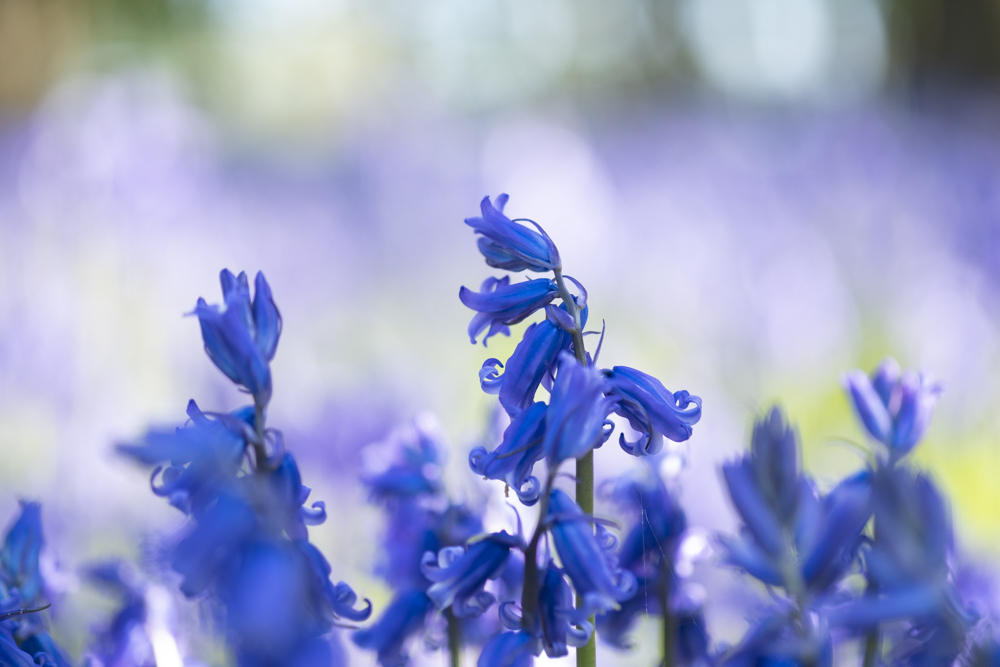
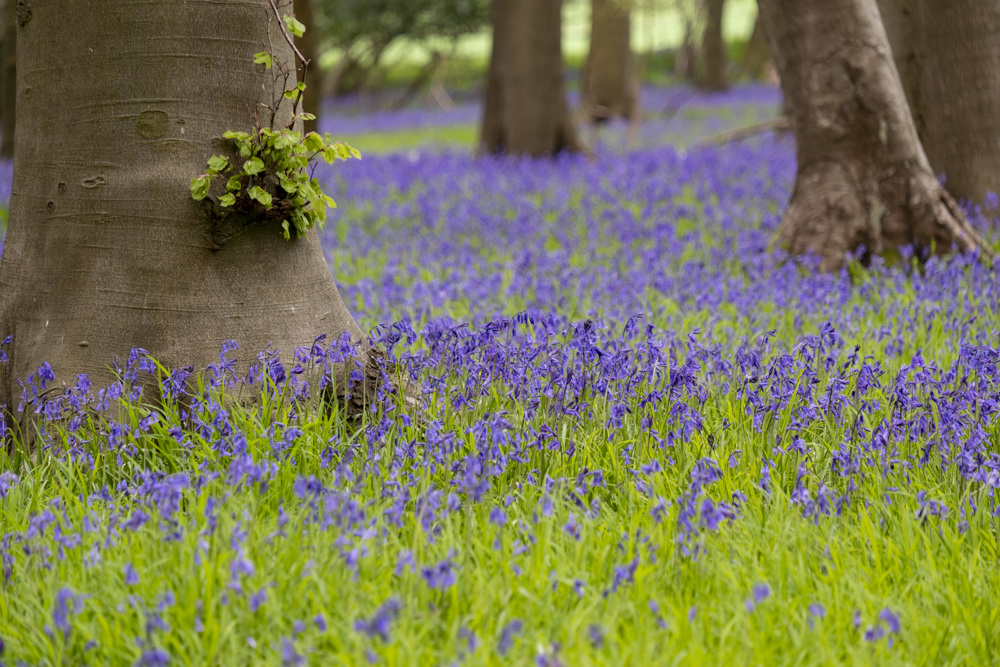
Watch your backgrounds and use depth of field to isolate and remove or diminish distractions – see green stalks in the background on the first two images. Taking narrow depth of field to an extreme makes a completely abstract image
Shot options
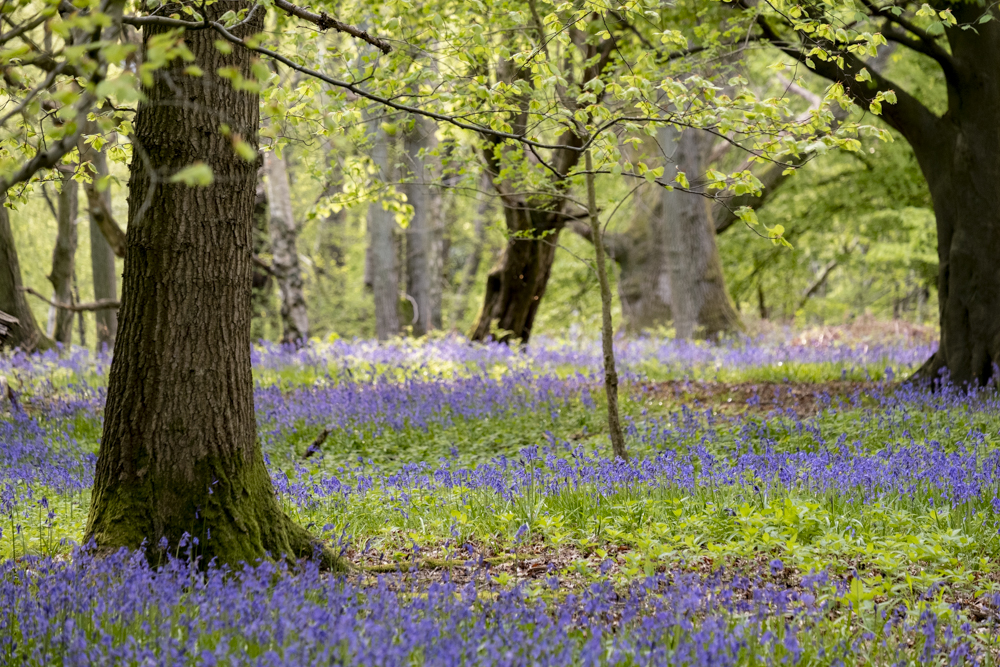
Let’s start with an overview shot. These work best where the view through the trees has both depth and as few or no horizontal or diagonal lines i.e. use the verticals of the tree trunks to give your composition an uncomplicated structure. Your next decision is depth of field – do you want the shot sharp from front to back or with a limited range of sharp focus. There’s no right or wrong way with any of these decisions, there’s just your way.
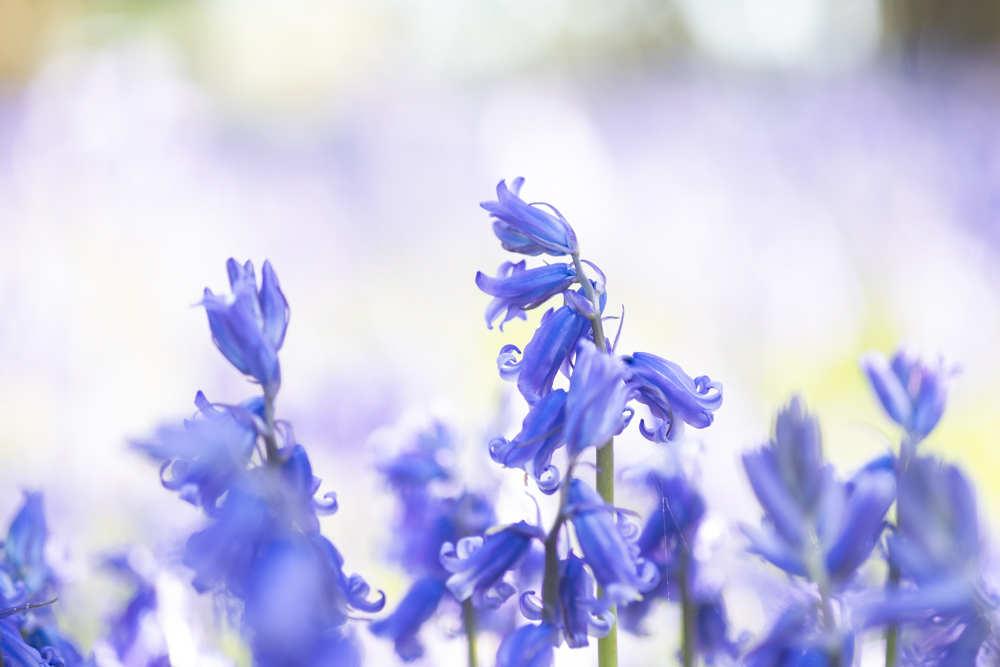
For close ups, a narrow or really narrow depth of field often works best. The flower of a bluebell has quite a complex shape so isolating this against an out of focus background often works best. If the background is a contrasting colour, most commonly green, the flower head or heads will stand out. With a narrow depth of field, the soft contrasting background gives shape and definition to the bell-shaped flower. You can still achieve this where the background is more bluebells of the same colour but here you need the narrow depth of field to truly define the shape, so the separation comes from focus alone rather than focus and colour contrast.
Position elements carefully. In the first shot the green stalks pull then eye downwards out of the frame.
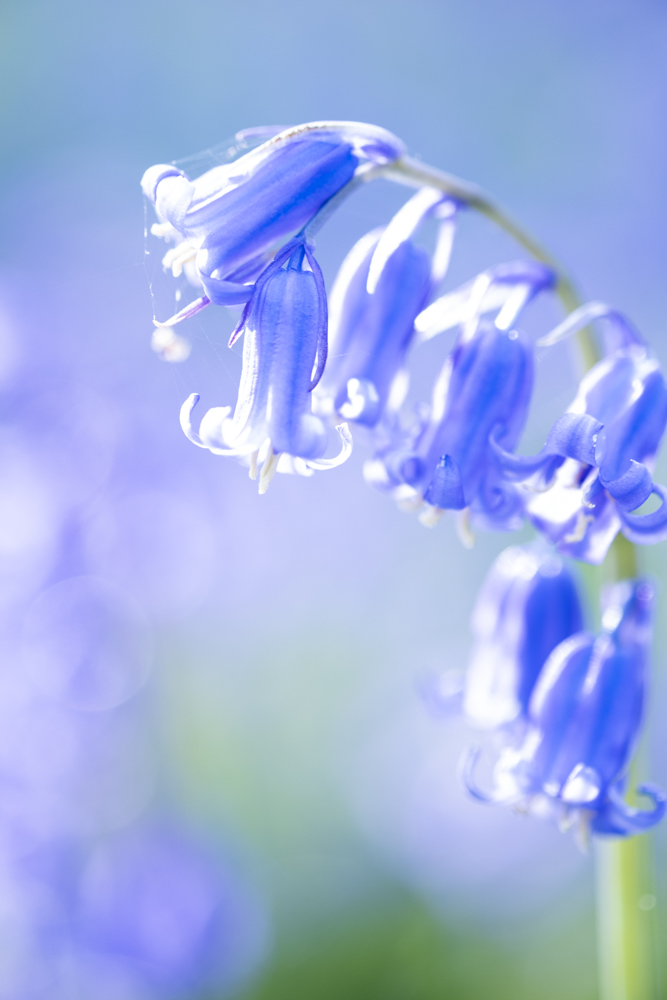
A shallow depth of field isolates the subject but can also throw the main subject partially out of focus. Don’t be afraid to play with limited focus though. You’ll have failures but some will work well.
Using the light
This is where you define the feel of your image. Many shots are taken on a bright sunny day and when the light is harshest. This rarely works so look for weather which is less suitable for sunbathing. Early mornings are good and if you’re lucky you may even get some mist or sunlight diffused through it. If it is sunny the end of the day can also work well. For a less graphic feel overcast or rainy weather gives a gentle feel with a more intense blue carpet.
Exposure also comes in here. Think about under-exposing in directional light and over-exposing when doing close-ups. The latter can give dreamy, impressionistic feel as long as you’re happy with images which are more lilac than blue.


Slight changes to exposure change both subject and background so position the key subject carefully for most impact. Over-exposing can be quite dramatic and effective but it does change the colour from blue to lilac.
Thinking outside the box
So how do you make a bluebell shot look different? How do you stamp your own style onto it? As always, try to pre-visualise the image you want to achieve. If you do this getting it may, or mostly probably will, result in some failures but you will have a vision of what you’re trying to achieve. The failures are part of the learning curve with each one taking you closer to the image in your head.
With close up shots try shooting through something. For example, more bluebells closer to the camera. This will create sharp focus surrounded by soft blur and can be very effective. The degree of blur is related to the f-stop chosen and the distance of the relative elements from both the camera and the subject.


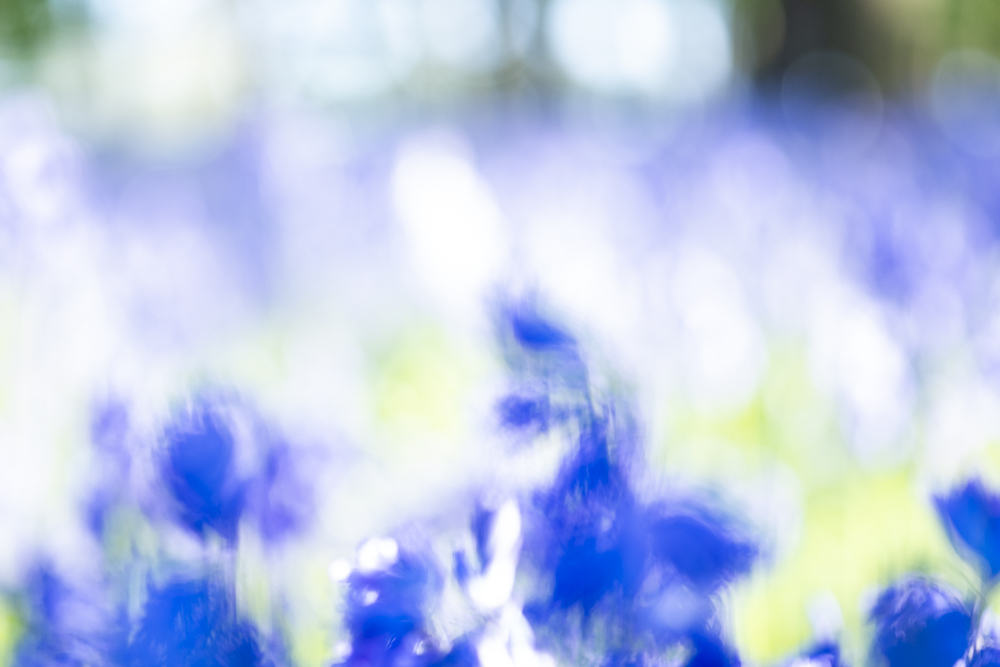
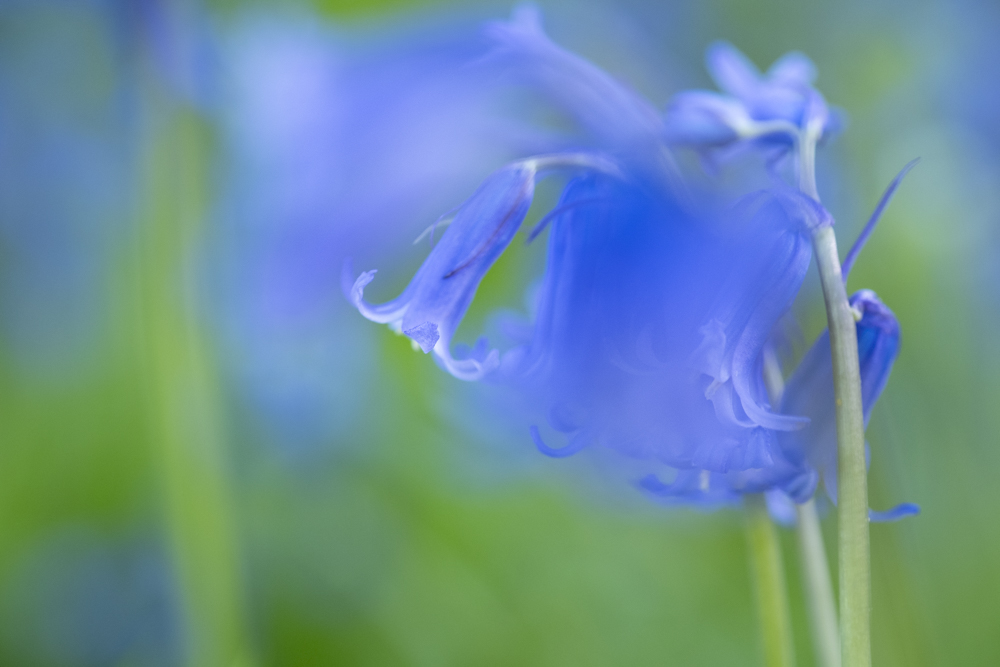
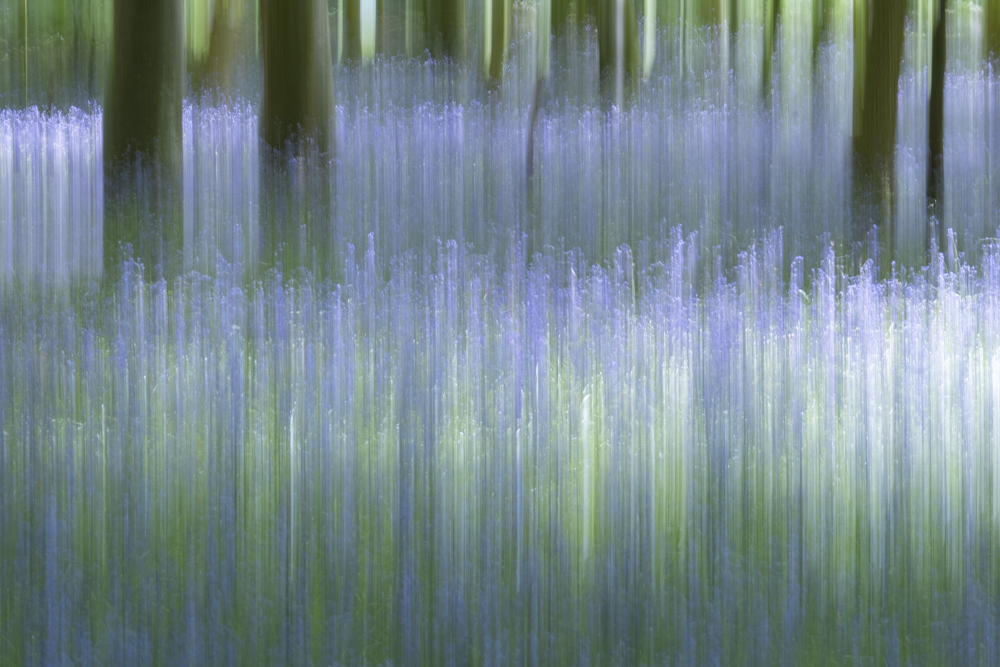
Camera movement makes an image more impressionistic and less complicated. It cleans up a more complex image. See the difference between the same scene photographed without (left) camera movement and with (right).
If you fancy a more impressionistic look and feel then try some ICM – intentional camera movement. It’s not as easy as it sounds but can be very effective when you master it, plus it’s fun trying. Start by using a simply vertical movement. If you start higher up the trees then you must end on the bluebells to bring in the colour. If you start on the bluebells and move the camera upwards then the proportion of bluebells and blue colour in the shot depends on how high you move the camera.


You must also make sure that you start or finish the movement with the bluebells in the frame if you want to pick up the colour. Watch out for hots spots in the background caused by light spots between the trees.. The faster you move and/or the slower the shutter speed, the more the blur.
With all ICM shots the more you move the camera and the faster you move it, the more impressionistic and less documentary the image becomes. Don’t forget to play with shutter speeds too. Movement should be smooth but you can also create some interesting effects by pausing the camera movement briefly during a longer exposure.
Pausing the camera movement during an exposure can create some interesting effects. This is easiest to do if the pause is at the start of the exposure.
However you approach photographing bluebells, or any other woodland, have fun and see what you end up with. The things you learn while doing it and playing with your camera will come in useful for your photography in general and you may well end up with something unusual, unique or striking.
Read feature on colours green and red
All images © Chris Coe
