
Every day, we see fabulous pictures of birds appearing in the media and social media, so surely photographing them can’t be that hard. Make no mistake, though, photographing birds, or at least doing it well, is much harder than it looks. You’re dealing with fast-moving wild creatures, and all wildlife is precisely that: wild, untamed and, to a degree, unpredictable so if you don’t know what you’re doing you’re photographing birds on a wing and a prayer. It’s a challenge which is both stimulating and sometimes frustrating, but it will push your photography to new levels.
If you think you can just rock up and get great pictures of wild birds, think again. As with all wildlife, understanding what you’re photographing is arguably even more critical than the photographic technique itself. Behaviour is a theme which keeps recurring in wildlife photography and many pros agree that it’s at least 80% of the process. So take some time to observe and work out any behavioural patterns. And there are patterns.
Like any other living thing, birds eat, mate, raise and protect their young and do everything else it takes to survive. Some species also migrate to do some of these activities or relocate when their environment is challenged or varies seasonally. Even this is usually a response to climate, food availability and safeness to rear their young.


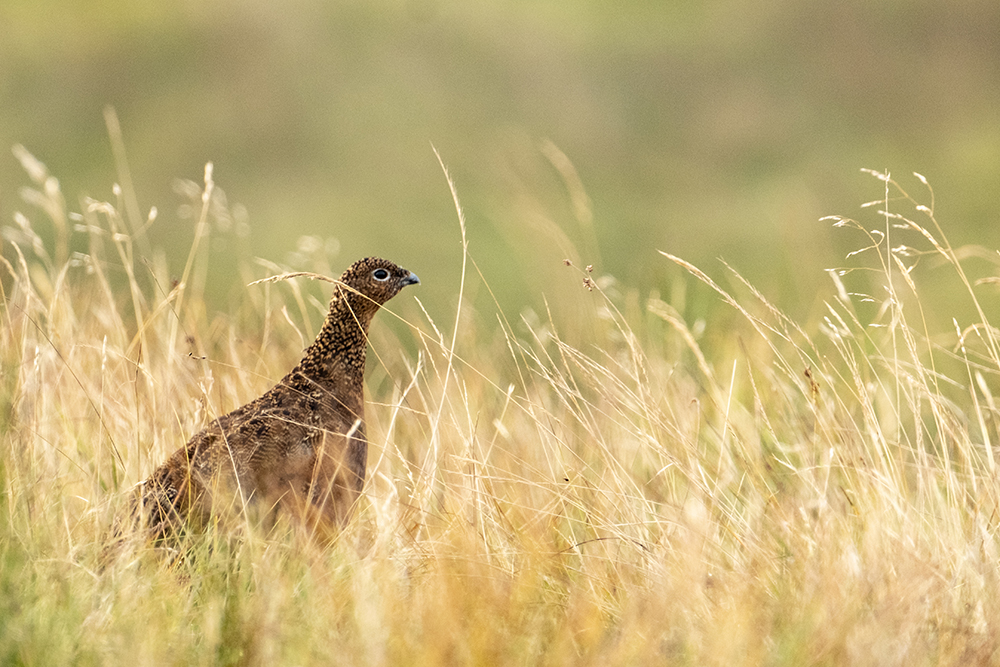
Unless you photograph birds which live around spaces shared with people, they are generally skittish and easily startled. They aren’t keen on humans getting close. So, patience and calm are essential to avoid spooking them in an ill-judged moment. Slow movements and camouflage, or cover, also help. Even then, getting close enough to photograph them well is often hard without an expensive and unwieldy long lens. Patience is very important even with a long lens as birds may fly away, but if you are still and quiet around a food source, they will return. Just wait, but wait prepared so you don’t need to make sudden movements with your camera when they do.
How to get started
If you’re just starting out with bird photography, it’s probably best to begin close to home, in a garden if you have one, in a park, near the beach where opportunist gulls are always on the lookout for snacks – all places where the birds are more acclimatised to people being close by. You could put out some food to draw them closer to you. Although this can lead to less natural imagery, it is an excellent way to get more familiar with their behaviours and gives you time to practice the camera setting which works best for you. You’re unlikely to get the most stunning bird photographs like this, but practising your skills is essential for when you are out in nature with birds which make only a fleeting appearance or don’t hang around for long.


Don’t be afraid to observe and learn bird behaviour in a garden or where food attracts them
The right gear – what you need
So, what gear do you need? It’s a bit like asking how long is a piece of string, but two lenses are particularly useful: a mid-range fixed focal length or zoom – something in the range of 100-200mm on a standard sensor; then a long lens – 300-600mm to allow you to stay further back from some birds or will enable you to get shots of the ones which stay further away. However, the lens focal length isn’t the only consideration. Long lenses need a faster shutter speed to hand-hold steadily. This faster shutter speed is also something which you’ll need anyway to capture many birds, as they tend to move so quickly.


Long lenses are needed for some shots, while medium range lenses can prove useful for wider shots and details
Using a tripod or monopod is an option, but not much use unless the birds you photograph keep coming back to the same spot so that you can frame the shot in advance. For less predictable birds, moving or in flight, a tripod can be more of a handicap than a necessity. Tracking them with the camera on a tripod is not as easy as with the camera handheld. Shooting handheld necessitates a fast shutter speed, and the longer the lens, the faster you’ll need to ensure sharp, camera-shake-free images. The loose rule of thumb is that the slowest shutter speed you should use is equivalent to the lens’s focal length (for a 35mm full frame or full-frame sensor). So, for a 500mm lens, 1/500th sec is the slowest you should use; for 100mm, it’s 100th sec. Of course, if you have shaky hands, then use an even faster shutter speed. If your hands are steady, then you can go slower.
The other factor to consider here is image stabilisation. Lenses with this option can easily buy you two or three extra stops, reducing shutter speeds and making handheld much easier. Remember, though, that the bird’s movements may require a faster shutter speed anyway. How you press the shutter is often overlooked. I have observed many photographers jab at the shutter release button. This creates additional camera movement, so be sure to squeeze the shutter, not jab it. This can make the difference when you’re shooting in low light and already on the limit of usable shutter speed.


Long lenses and fast shutter speeds are often needed You can freeze the motion or blur it, or even choose a shutter speed which freezes the head and body but shows movement in the wings as with the shots of humming birds
Photography is as much about breaking the rules as sticking to them, and some bird photography requires a different approach, so push the boundaries. You might be surprised by the different images you end up with.


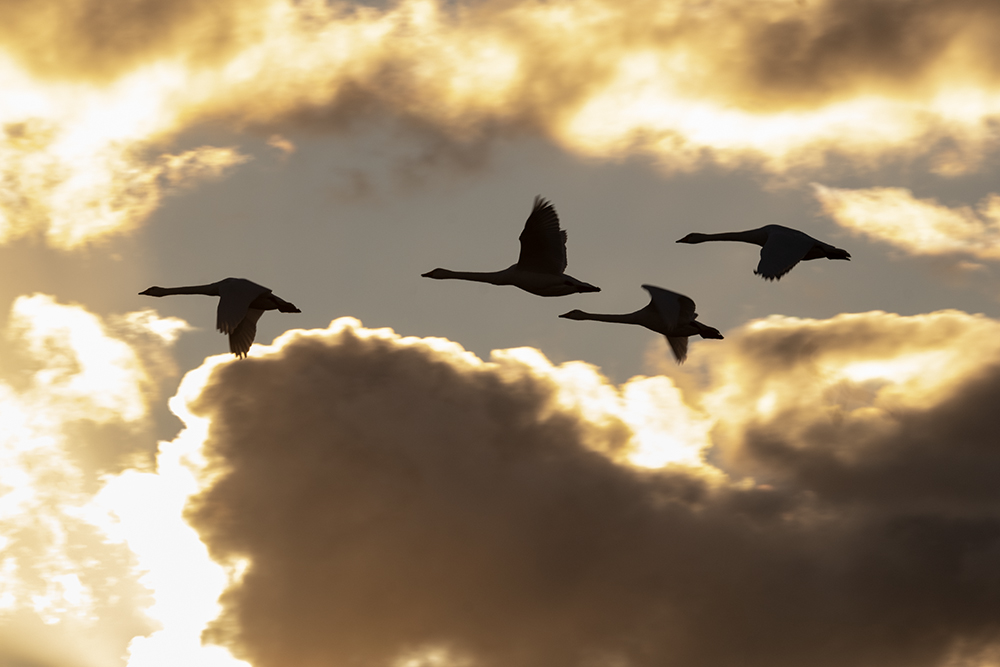
Panning freezes the action, if you match the speed perfectly, with no other noticeable effects when the background is a a single colour like the sky. Where the background is more complex, panning creates blur making the bird in sharp focus stand out against the blur. In this shot the tips of the wings, moving in a different plain, still show movement
When birds are moving, you can choose to freeze their movement, blur it, or both. Fast shutter speeds freeze, slower ones – slower than the speed of the bird’s movement – blur. Most birds tend to fly in a horizontal plane unless diving or climbing. However, their wings move much quicker and in a vertical plane when in flight. You can freeze the horizontal flight motion with the correct shutter speed but still blur the wing movement. Freezing and motion blur are all about relative speeds of movement, and the trick is to work it out for yourself. It’s easiest to start with a shutter speed which will definitely freeze all movement, then slow it down in increments until you achieve the desired effect. Some birds move faster than others, some hover, so again understand their behaviour will help you to chose how you approach photographing them.
Context and background
Close-ups of birds may be beautiful, but context and environment are also important. Birds in flight will almost inevitably include the background. Birds which are perching or resting allow you more time to frame a shot and compose it carefully; it is up to you how much background you choose to include to give that context. A narrow depth of field can be helpful here to isolate the bird from the background, but sometimes, leaving some detail, perhaps in soft focus, can really make an image.


Background gives context so don’t be afraid to include it. Not every shot has to be a long lens close up
Panning with a flying bird requires you to match the bird’s flight speed. This is likely to cause the background to blur, giving a sense of speed and direction of flight. You will have to match the bird’s speed in order to keep it pin-sharp, so practice panning and be careful not to arc the camera when you pan, as this will introduce vertical movement into a horizontal pan.
Don’t always believe what you see
You’ll undoubtedly have seen some stunning bird photography, especially if you look for it online, particularly on social media. There are two things to be aware of and bear in mind here. First, many of the shots you see won’t be in full frame. They will be cropped and, in many cases, substantially crop. So if you look at images and think I could never get that close, or I don’t have a long enough lens, then maybe you are looking at them too literally. In the latest high-end cameras, the sensors are so good that you can often crop heavily but still maintain high image quality which is certainly good enough for online usage.


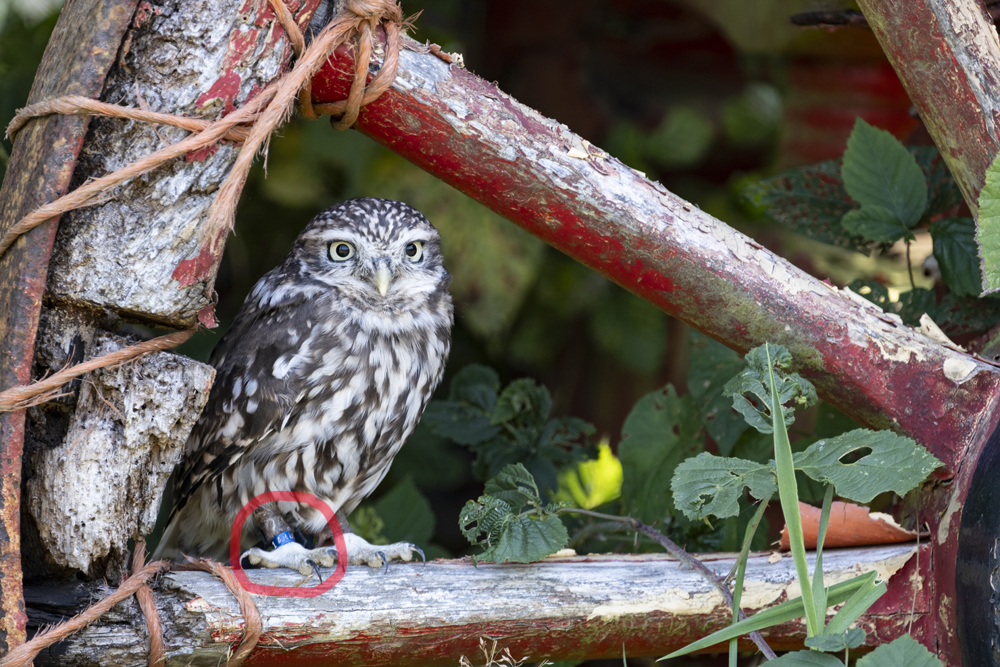
Some images are not what they seem. Many pictures you see of of owls and kingfishers are taken with captive birds which are tame or clipped at centres set up with hides especially for photographers
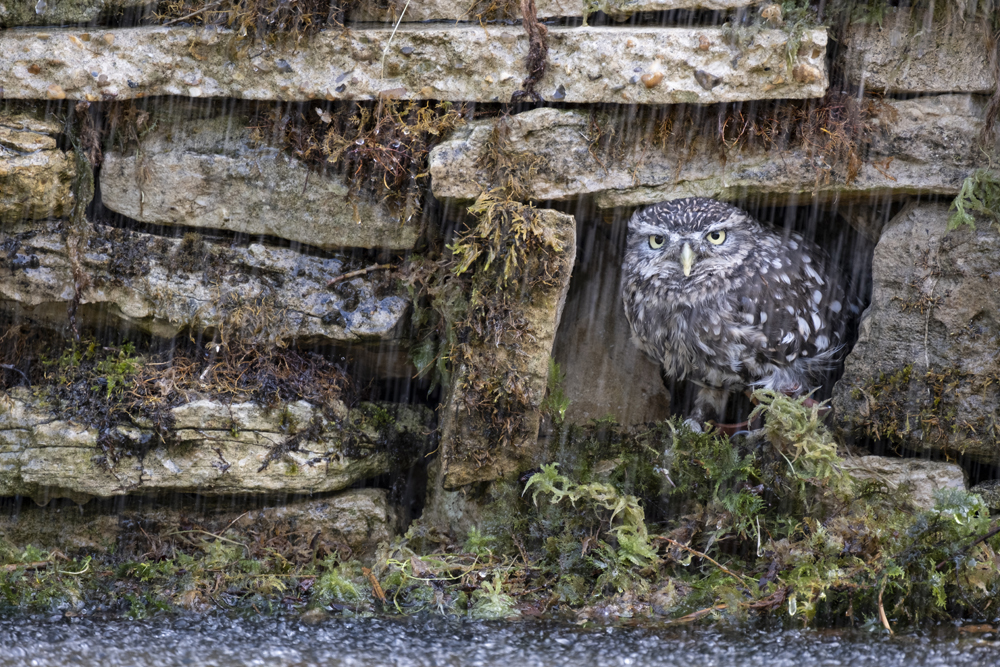
Second, if you have seen stunning images of kingfishers, owls, and sometimes birds of prey and thought, wow, how did they do that? Actual wildlife photography takes time and patience, not just a little luck. Many of these shots are taken at places that are especially set up for photographers and photography. In the cases of owls and maybe birds of prey, the birds are often kept in cages or aviaries and brought out for the photographers. These birds may have their flight wings clipped and will undoubtedly be ringed. The clue is in the feet. Where these are included in the shot, you should be able to see this ring for captive birds unless the photographer has worked hard to mask or hide it, or framed up the shot to exclude the feet completely.

With kingfishers, it’s slightly different. A well-set-up stream or pond stocked with the right fish will often keep the kingfishers there. Then all that’s needed is a hide for the photographers to sit and wait for their shots. Kingfishers often have specific fishing points or branches which they perch on, so it’s much easier to use a tripod and frame up the shot in advance.
None of this changes the fact that the photographer still has to compose and get the shot, which is not guaranteed. It still requires skill, technique, observation and an eye for good composition. In this article, all the images were taken in the wild, except the owls which are not in flight.
Mastering the craft
For most bird photography, the photographer has to work hard for their shots. It requires patience as I’ve already said, but also planning, vision, skill, responsiveness, quick reactions, practice and more patience. Expect to get lots of failures. It’s all part of the sometimes frustrating but fun experience. You’ll get blurry shots where your shutter speed was too slow or where the bird has moved suddenly. You’ll get shots with half a bird in too, or maybe no bird at all, when it’s unexpectedly taken off just as you press the shutter. If you’re using auto-focus, there’ll be occasions when the camera hasn’t focused quickly enough or picked up the wrong focus point. It all takes practice.


Observe and practice, practice practice to find the moments when the birds are still, however briefly
In newer cameras, subject recognition is often built in. This picks up focus for the chosen subject in the continuous focus mode, so select the ‘birds’ setting. It’s still not infallible, though, so again practice. Manual focus also comes with difficulties, so when you start, auto-focus may be your best option. Familiarity with your camera always helps. In fact, it’s essential, and, in this instance, when photographing birds, moving the focal point quickly to the chosen position can make or break a shot.
Subject recognition settings can be useful to ensure sharpness
More than a prayer
There’s a perception, a wrong perception, that modern cameras will get the shot for you. Despite all the new onboard features, photography is still a craft. No tech tools can teach you composition and framing, exposure compensation or creative exposure control. These we have to learn and practice. Minimising all these potential technical issues is an essential part of developing your photography. But even with these mastered, good bird photography still comes back to understanding bird behaviour for the species you’re photographing and being able to predict what is likely to happen next. And that, as with so many things in photography, comes down to observation, vision and anticipation. So stop praying and practice! Bird photography gets you out in nature. That alone is enjoyable and rewarding. Birds are wonderful and intriguing creature, and the moment you get you first good shot is exhilarating.
All images © Chris Coe
Sites for identifying birds – RSPB – Birds of the World
